When creating responsive websites there are so many options to choose from. I've come to favour AngularJS and want to take the time to walk through creating a non trivial, useful tool.
Standing on the Shoulders of Giants
Using a seed app gives a well designed and extendible structure. Start by downloading the angular-seed app from github.
Extract the into your project folder and start your web server. The server itself is not the concern of this post, django, nodejs or python's built in http server will work fine to serve the content.
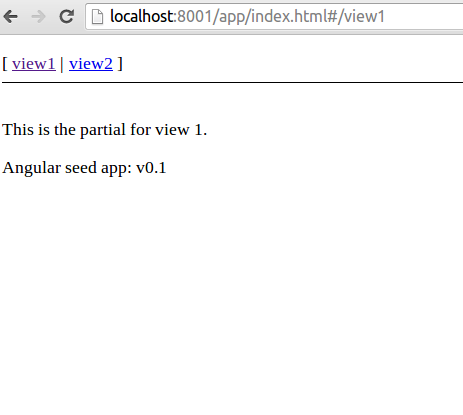
If everything has gone well you should be able to aim your web browser at localhost:8000 and sees something very exciting like:

Directory Layout
Lets take a quick digression to look at where all the files are:
app/                --> all of the files to be used in production
  css/              --> css files with default stylesheet
  img/              --> image files
  index.html        --> app layout file (the main html template file of the app)
  js/               --> javascript files
    app.js          --> application
    controllers.js  --> application controllers
    directives.js   --> application directives
    filters.js      --> custom angular filters
    services.js     --> custom angular services
  lib/              --> angular and 3rd party javascript libraries
    angular/        --> the latest version of angular js (and minified etc)
  partials/         --> partial html templates or fragments
    partial1.html
    partial2.html
scripts/            --> handy shell/js/ruby scripts
  e2e-test.sh       --> runs end-to-end tests with Karma (*nix)
  e2e-test.bat      --> runs end-to-end tests with Karma (windows)
  test.bat          --> autotests unit tests with Karma (windows)
  test.sh           --> autotests unit tests with Karma (*nix)
  web-server.js     --> simple development webserver based on node.js

test/               --> test source files and libraries
  e2e/              --> end-to-end test runner
  unit/             --> unit level specs/tests
Now say we want to change these two views to create a user interface for placing and configuring sensors. The application is a single page app, so the app/index.html file is the all important first step. Add some extra html semantics by adding headers and footers.
The stylesheet in app/css/app.css is the appropriate place to be making any design changes. At this point I usually add bootstrap, AngularUI, and D3.js to app/lib/bootstrap and include them appropriately from index.html.
<script src="lib/angular/angular.js"></script>
<script src="lib/bootstrap/js/bootstrap.min.js"></script>
<script src="lib/ui-bootstrap-0.5.0.js"></script>
<script src="js/d3.v3.min.js"></script>
Partial
Taking in the view
Each independant view has two components:
- The html fragment e.g.
app/partials/partial1.html - The controller e.g.
app/js/controllers.js
The partial simply contains the view's html. The caveat which we will explore soon is that we can use non standard tags. The controller is somewhat analogous to the model in the MVC paradigm.
Don't repeat yourself
One directive that AngularJS provides is ng-repeat. This allows items to be taken from an iterable from the controller. I will cover in the next section how the sensors are defined. Assuming the controller will provide this we can write html to create a new div for each sensor with the following:
<div ng-repeat="s in sensors" class="row well">
  <h4>Sensor {{ $index + 1 }}: {{s.name}}</h4>
  ...
</div>
This will create as many div elements as there are elements in the sensors array.
The name attribute of each sensor will be included in an h4 tag in the contents of each div along with an index number.
Controller
So enough beating around the bush, how do we use the controller? Open up app/js/controllers.js and change:
controller('MyCtrl1', [function() {

}])
to
controller('MyCtrl1', '$scope', [function($scope) {
  $scope.sensors = [{name: "Laser (of Doom)"}, {name: "Physic Touch"}]
}])
This tells angular that our controller is going to have a $scope object - essentially a private namespace that defines the interface between the partial and the controller.
Binding to changing data
Returning to our partial1.html file we need to add some way to modify the sensor information. Say our sensors have a direction in which they are pointing, and a beam width. Adding input elements bound to particular sensors' data is straight forward using the ng-model directive:
<input class="span2" ng-model="s.angle" type="range" min="0" max="360" integer/>
<span><input ng-model="s.angle" type="text" class="span1" integer/> degrees</span>
This provides two methods of changing the angle attribute of a sensor. Just add similar things for say the sensors' beamWidth and we have the beginnings of a configuration interface.

This is all that is needed to bind the front end to the controller, as the slider is moved the integer number of degrees changes, and if you type in a new angle the slider jumps to the correct place instantly. Additionally if the value is changed from the controller the value immediately updates on the screen.
Wait a second. It doesn't work!
Yes, I was a bit sneaky and put the word integer at the end of our input elements. This is because I want to enforce the use of only integer numbers as sensor angles. The way we do this is with a custom directive; just like the non standard html ng-repeat we can introduce our own html attribute!
Custom Directive
So open up app/js/directives.js and replace the appVersion directive with this:
.directive('integer', function () {
    return {
        require: 'ngModel',
        link: function (scope, ele, attr, ctrl) {
            ctrl.$parsers.unshift(function (viewValue) {
                return parseInt(viewValue);
            });
        }
    };
})
In a nutshell this will call parseInt on any new values before updating the model associated with the element that has this integer directive. How cool is that?!
Beam me up
Time to get a touch more interesting, say we want to graphically represent our sensors - while we are still changing them... Add the markup to our partial:
<div ng-repeat="s in config.sensors.sensorData" class="row well">
    <h4>Sensor {{ $index + 1 }}</h4>

    <beam size="150" color="red" angle="{{ s.angle }}" beam-width="{{ s.beamWidth }}"></beam>

    <label>Angle
    ...
We have added a beam element with normal enough looking attributes for size and color, no problem understanding those. The angle and beam-width attributes have angular template expressions which are obviously going to have to be evaluated continuously... somehow.
Enter our second directive beam also added to the directives.js file:
.directive('beam', function(){
    return {
        restrict: "E",
        template: "<div></div>",
        replace: true,
        scope: {
            // attributes
            size: "=",
            color: "=",
            angle: "@",
            beamWidth: "@"
        },

        link: function(scope, iElement, iAttrs, controller) {
        }
    };
});
This directive is explicitly only for Elements, and can't be added as an attribute like integer was. The template is what html replaces the custom element. So as it stands a div block would be found in the DOM instead of a beam (after AngularJS has worked its magic).
The scope is where we can add the attributes and specify whether they will be bi-directionally bound. In this instance angle and beamWidth are locally bound to the DOM element in a one way update. If it changes in the parent that change can be observed by the directive, although the data is always a string. The size and color attributes are directly bound bi-directionally - similar to ng-model.
The last piece of the puzzle is the link function. It is passed a private scope, the instance element, the instance attributes, and a controller which isn't used in this example.
So to get the size and color for a particular beam we can access the instance attributes:
var size = iAttrs.size;
To get the div block that AngularJS has switched with the beam block we access the instance element:
var g = d3.select(iElement[0])
    .append("svg")
    .attr("width", size).attr("height", size);
This tutorial is already fairly complex so I'll skip giving a detailed description of actually drawing the svg with d3.
To watch the angle and beamWidth attributes we call $observe on their respective instance attributes:
iAttrs.$observe('angle', updateGraph);
    iAttrs.$observe('beamWidth', updateGraph);
Then within the updateGraph function (which we define in the link function) we simply use $scope.angle and $scope.beamWidth.

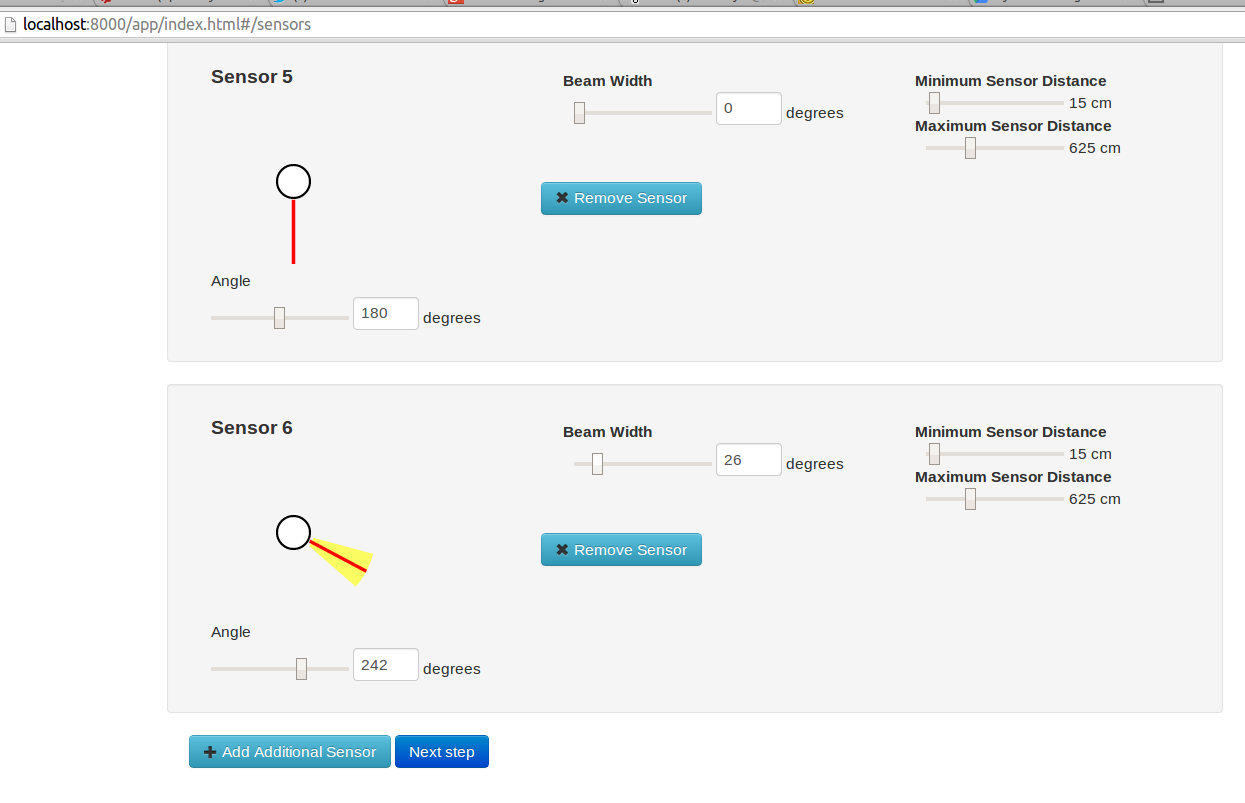
As you can see I've also added a couple of extra buttons.
Second look
Adding another view and controller is relatively straight forward, just add the content to the html file and the logic into the controller. If we wanted to share state between controllers we can use a $rootScope namespace as well (or instead) of a $scope namespace.
.controller('MyCtrl2', ['$scope', '$rootScope', function($scope, $rootScope) {
    ...
Say we wanted to show some more configurable information beside each sensor we could make a table and reuse our beam directive.
<tr ng-repeat="(idx, s) in config.sensors.sensorData">
    <td>
        <beam align="center" size="35" color="black" angle="{{ s.angle  }}" beam-width="{{ s.beamWidth }}"></beam>
    </td>
    ...
This can produce something like the following image:

Loading real data?
So this is all good and well but we have our data hard coded in the sensors javascript array, by leveraging AngularJS's http module we can easily make a request for the initial data:
$scope.import = function(filename){
        $http.get(filename, {}, {}).success(function(data){
            $rootScope.sensors = data;
            $scope.loaded = true;
    });
};
This can be triggered by a button which could take the filename from a form:
<div ng-hide="loaded">
  <input ng-init="filename='/config/EXAMPLE.CFG';" ng-model="filename"/>
  <button ng-click="import(filename)">Import file</button>
</div>
Note that ng-hide and ng-show can be used to conditionally display blocks.
Wrapping up
It don't think its just the Google koolaid, AngularJS is really easy and productive for putting together complex live user interfaces. Also d3 rocks.